Appearance
VSCode 配置方法
1. 安装 Github Copilot 插件(如果已安装,请更新至最新版本)
请务必更新到最新版本!
2. 配置 Github Copilot
打开 VS Code, 按下快捷键 Ctrl+Shift+P(Mac 用户按下 Cmd+Shift+P), 输入 Preferences: Open User Settings (JSON), 打开设置文件, 加入以下配置项:
警告
配置文件格式为json,注意末尾的逗号。
jsonc
{
    // ..., // 其他配置
    "chat.extensionUnification.enabled": false,
    "github.copilot.advanced": {
        "authProvider": "github-enterprise",
    },
    "github-enterprise.uri":"https://cp.acce.dev",
    // ..., // 其他配置
}
3. 登录账号
重启 VS Code, 然后点击左下角的用户头像,再选择 Sign in with cp.acce.dev to use Github Copilot, 然后继续按照提示完成登录即可, 登录成功后就可以正常使用 Copilot 插件了。

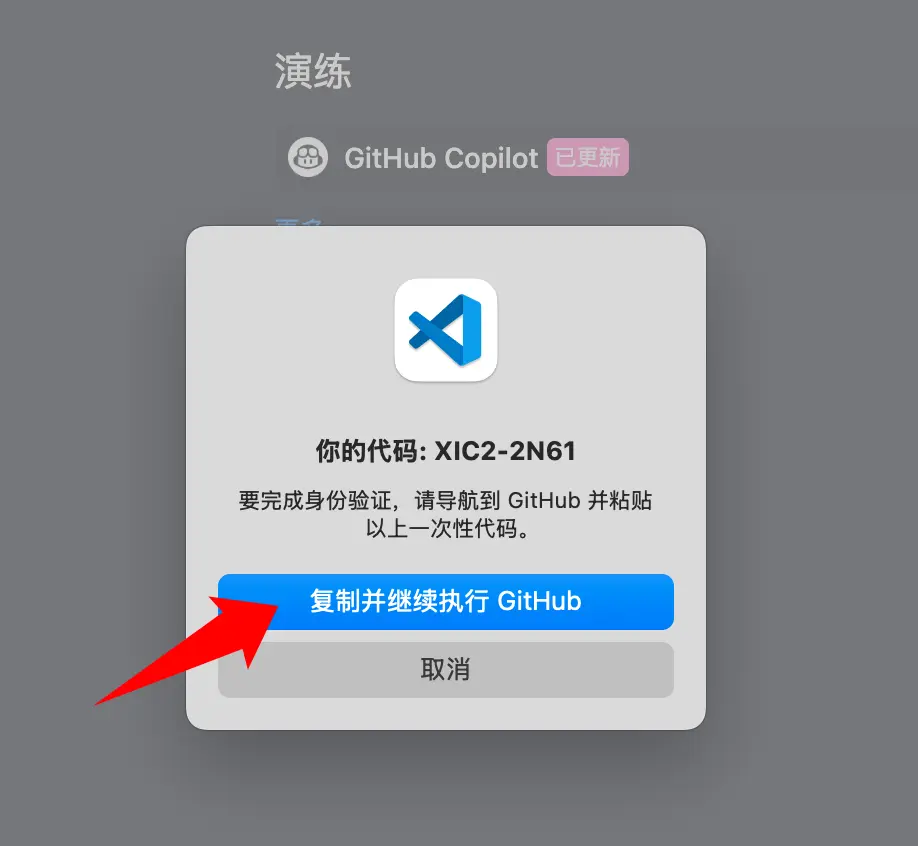
复制设备代码:
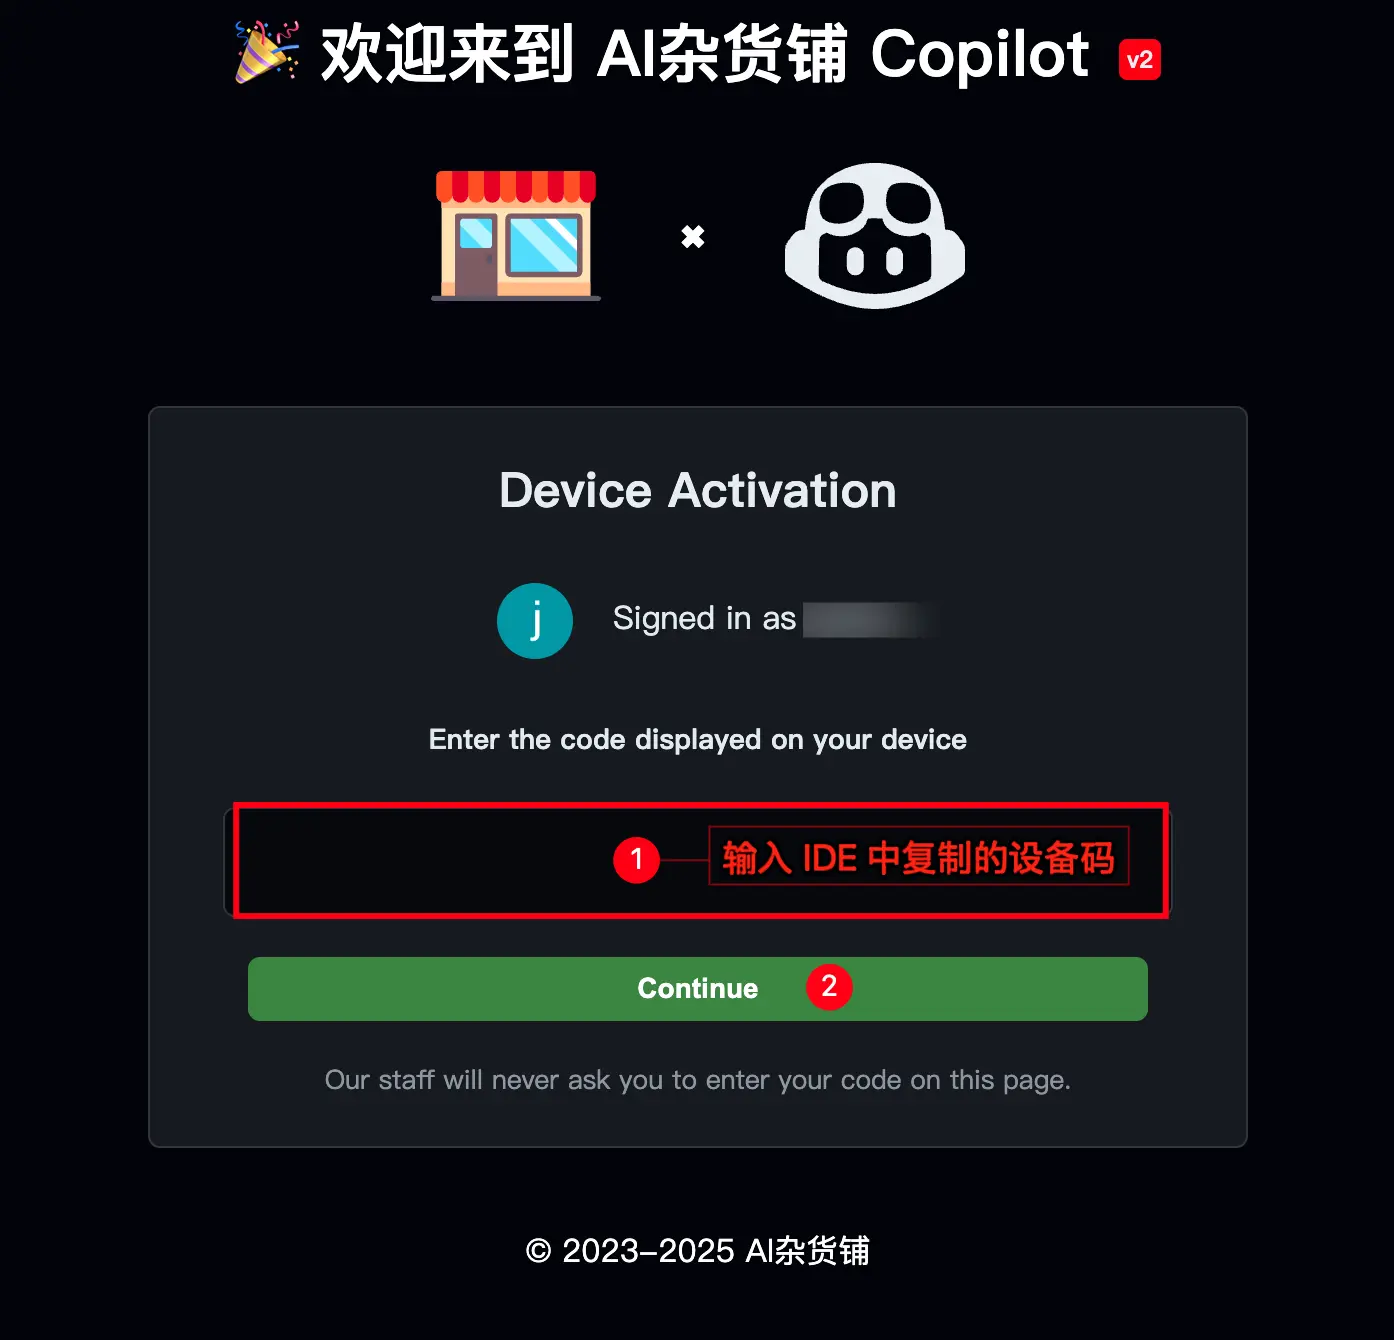
在弹出的网页中填入设备码:
✅ 配置完成!
4. 测试代码补全功能和对话功能
打开 VSCode, 写一行注释, 看是否有提示, 如果有提示, 就表示授权成功了!
python
# quick sort
def [等待补全]